Traditional Lebanese Hummus Recipe

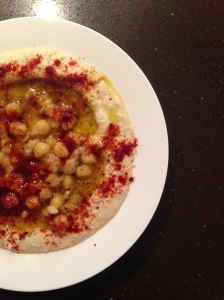
hummus There are so many variations on how to make hummus that I enlisted my mum’s recipe. My mum is THE BEST COOK I have ever come across. As she doesn’t use recipes when cooking, I tried to get as close to real measurements as possible. I have tested this out and it works well. You can cheat by using canned chickpeas… it won’t taste as amazing, but it will be pretty close 🙂 Serve with this delicious nut bread for a complete meal..

If you would like to receive similar recipes in your inbox, be sure to add your email address to the follow link 🙂

Preparation (the day before)

1.  Soak your chickpeas in hot water for 8 hours or overnight. 

Ingredients:                     

  • 2 x cups chickpeas, still warm, or cold and peeled (see step 1)
  • 1/4 x cup tahini
  • 2 1/2 x fresh lemons, or about 8 tablespoons lemon juice
  • 1-2 cloves of garlic, pasted (bang with mortar and pestle, crushing doesn’t work!)
  • 1 tsp sea salt
  • 1 tsp cumin
  • paprika to serve
  • really good quality extra virgin olive oil to serve (you can go without if you’re dieting)

To prepare:

  1. Rinse the soaked chickpeas, and then pour then into another pot and boil them for around an hour until tender. (Keep the water you boil them in). Set aside 2-3 tab of chickpeas for later.
  2. Pour tahini and lemon juice into your food processor and pulse until creamy and pale in colour. Add salt, and garlic to your lemon-tahini sauce.
  3. Pour chickpeas into a food processor and blend well.  Add as much of the water left over from step 1 as you want to achieve your desired thinness.  Taste and adjust seasonings. 
  4. Let this all run in your food processor for 2-3 minutes until smooth.

Serve drizzled with olive oil, and top with extra chickpeas, paprika or cumin.

hummus2

Salted Chocolate brownies

Ingredients:

  • 10 mejool dates, pitted    Serve with fresh berries
  • ¼ cup cocoa powder
  • 1 x cup walnuts
  • 1 x cup almonds
  • 2 tsp vanilla bean paste
  • 4 tab protein powder
  • 2 tab water
  • 1/2 tsp sea salt

To Prepare:

  1. Combine nuts into a food processor until roughly chopped.
  2. Remove 1/4 of the nut mixture and set aside.
  3. Add the dates, vanilla, protein powder, cocoa and sea salt to the food processer. Process again until combined.
  4. Add the water and blend until it becomes like cookie dough.
  5. Add the nuts that you set aside and mix well
  6.  Press into a small square baking tin lined with grease proof paper.
  7. Refrigerate for 3 hours and then serve 🙂

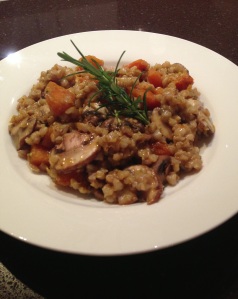
Delicious gluten-free risotto

If you’re like me risotto is one of those foods that is so hearty and comforting when you eat it but then makes you feel so bloated and sick about 20 minutes later. This recipe came about after a lovely lady at work gave me a bag of barley. She uses it to detox and cleanse and has been advised to drink barley water daily. With all the negativity that grains have been receiving lately, we are completely missing the point. Some grains are highly nutritious and do wonders for our body. All grains are definitely not created equal and barley is one of those. It is rich in fibre, unbelievably nutritious and has a yummy nutty flavour. It absorbs almost 5 times it’s size in water making it a great substitute for arborio rice in risotto.

I must warn you, this recipe takes a while. It took me almost an hour and a half although I have learnt to cut a few corners and slow down the cooking time. I have gotten it down to around an hour! Make a whole batch and freeze them into individual portions. It stores really well and is great for work lunches/dinners when you’re craving comfort food but do not want to cook. You can use any vegetable combination that you like. For this one, I have used pumpkin and mushrooms. Asparagus would be a great addition as well.

Ingredients (serves 4)

  • 3/4 cup barley      Deliciously indulgent
  • 1 litre water
  • 500ml vegetable stock
  • coconut/olive oil spray
  • 200gm mushrooms, sliced thinly
  • 300gm pumpkin, cut into small cubes
  • 2 x brown onions, diced
  • 2 x cloves garlic, crushed
  • 1 tsp dried oregano
  • Sea salt and pepper
  • rosemary sprigs (optional, to garnish)

To Prepare:

  1. Combine the water and stock in a medium saucepan, bring to the boil, reduce heat and let it simmer covered.
  2. Spray a separate medium saucepan with olive oil spray, heat on medium.
  3. Add garlic and mushroom and cook until the onion softens.
  4. Stir in barley, add 1 cup of the stock, bring to the boil, reduce heat and simmer until the stock is absorbed.
  5. Keep adding 1/2 cup of stock at a time, until liquid is absorbed.
  6. While your barley is cooking, prepare your vegetables.
  7. Heat a fry pan sprayed with oil on medium, cook pumpkin until tender (about 5-6 minutes).
  8. Add a generous amount of sea salt and pepper, the oregano, mushrooms and cook until tender. Set vegetables aside in a bowl (this will stop the cooking process and prevent them from going mushy).
  9. Once the barley has absorbed all of the stock (about 50 minutes), add the vegetables and heat through.

The creamiest carrot, sweet potato + coconut soup

This is the first soup recipe I have ever created and it is freaking delicious. I kid you not. I was in absolute heaven when I had my first taste and immensely proud of myself. I honestly can’t believe how little calories there are in this recipe. I’ve calculated approximately 250 per massive bowl.

This is a basic soup recipe which uses coconut water in addition to stock. Coconut water adds a sweet nutty texture to this soup and increases the levels of potassium and is super hydrating. This recipe freezes really well. Make a whole batch, separate it into individual servings and freeze for when you want a delicious comforting dinner. I had mine with a toasted slice of my delicious nutty flour-free bread. Addictive.

Ingredients (Makes 4 massive servings)       photo-18photo-19

  • 500gm carrots, peeled and chopped
  • 500gm sweet potato, peeled and chopped
  • 2 brown onion, diced
  • 2 tab ginger, grated
  • 750ml vegetable stock
  • 500ml coconut water
  • 1 lime, juiced
  • 1 tab coconut oil
  • 1 tsp curry powder
  • 1 1/2 tsp pepper
  • 1 tsp sea salt

To serve:

  • fresh basil, torn
  • fresh chilli, sliced


To Prepare:

  1. Heat oil in a saucepan over medium heat. Add carrots, sweet potato, and onion. Cover and cook, stirring occasionally, until vegetables soften and brown slightly, about 15 minutes.
  2. Add ginger, stir, and cook 1 minute.
  3. Add chicken stock, bring to a boil, partially cover, then reduce to a simmer for 10 minutes, or until vegetables are soft.
  4. Using a stick blender, puree until smooth.
  5. Add coconut water and blend to combine. Add lime juice, seasoning and curry powder. Stir, then heat through.
  6. Garnish with chilli and fresh basil. Yum.

Crunchy thai chicken salad

I think it is pretty clear I love asian food. All you need to do is browse throughout my recipe collection to see how many are influenced by the tastes of Asia and fresh Asian ingredients. The prime reason for my obsession is the crispness of the flavours and just how easy it is to adapt the recipes into delicious and healthy meals.

I go on and on and on about balance in cooking, but it is just so important. I have ruined many a meal by getting the ingredient ratios wrong.  The ratios in this salad are really simple and will ensure you have the perfect sweety, salty, tang.

This salad uses wombok as its main ingredient. I use wombok a lot as a substitute for cabbage. Although they are very similar, wombok is much milder than cabbage so absorbs flavours quite readily. You can usually find wombok at your local supermarket but if not, check out your local chinese grocers.

You can make this salad as a side for bbqs or a complete meal with chicken. To save time, I usually shred the whole cabbage and use half of it to make my snapper, shiitake mushroom and wombok stir fry  and the other half for a salad later in the week.

Ingredients (Serves 2)             Delicious thai crunch salad

  • 300gm chicken breast
  • 1 tab lime juice
  • 1 clove garlic, crushed
  • 250gm wombok, shredded
  • 200gm cherry tomatos, cut in half
  • 1 small red capsicum, cut into strips
  • 1/2 cup torn mint leaves

Salad dressing:

  • 1/4 cup lime juice
  • 2 teaspoons brown sugar
  • 2 teaspoons fish sauce
  • 1 long red chilli, finely chopped

To prepare:

  1. Combine the chicken, 1 tab lime juice and crushed garlic in a bowl. Mix well. Season with pepper.
  2. Spray a pan with olive oil, heat on medium. Cook the chicken on medium heat for 4 minutes each side. Make sure it is well cooked.
  3.  While the chicken is cooking, whisk together the salad ingredients with a fork.
  4. Once chicken is cooked, allow to rest for 5 minutes, slice into strips.
  5. Combine salad ingredients together, drizzle with dressing. Delish 🙂

The yummiest Prawn (shrimp) and Avocado Rice Paper Rolls

Rice Paper Rolls Preprice paper rolls


Vietnamese rolls are served cold and not fried. They are really healthy, light, tasty and generally gluten-free so you don’t get that horrible bloated feeling after having them. These are one of my favourite things to make. They are quick, easy, the ingredients can be easily substituted and they are always satisfying. I have provided the recipe below for my favourite combination and this is definitely the most popular, however I change this all the time depending on the ingredients I have at home or in the garden.

Traditional rice paper rolls use vermicelli noodles. I have omitted these as I find that they add calories but no flavour. Instead I use shredded carrots.

The number 1 comment I receive when I post these on instagram is that they always fall apart for people. I’ve given a few tips below on how to stop this from happening:

  • make sure your water is lukewarm and never submerge the rice paper  for too long; four or five seconds is fine and make sure it is still a little hard when you take it out. Place it straight onto a damp tea towel to allow it to soften further while you’re preparing it. Work fast.
  • Try and make the rolls as close to possible to when they are going to be served. Prep all of your ingredients before hand and roll them at the last minute.
  • If you are making them for lunch the next day, make sure they do not over-lap during storage as they will stick together.
  • Don’t over-fill the rice paper roll. You will know you have over-filled it if it starts falling apart as you are rolling it. Less is more.


Ingredients (Makes 6 rice paper rolls)

  • 1 packet gluten-free rice paper rolls, if you are in Australia I use Pandaroo. They are the best and easiest to roll (in my opinion).
  • 12 large (either king or tiger) grilled prawns (shrimp), peeled and de-veined. tales removed.
  • 1 cup coriander, rinsed and roughly chopped
  • 6 mint leaves, rinsed (can omit if you prefer)
  • 2 carrots, shredded
  • 1 avocado, cut into strips
  • 1 tab lime juice (can substitute for lemon)
  • 2 tab oyster sauce

To Prepare:

  1. Spray a fry pan with coconut oil or olive oil spray. Mix prawns with oyster sauce and then gently pan fry on medium heat until cooked. The oyster sauce should get sticky and slightly burnt. Once they are cooked, put them aside to cool. Slice them in half lengthwise or into small pieces.
  2. While your prawns are cooling, combine the avacado with the lime juice in a small bowl. Make sure all of the avacado is covered. (this prevents the avacado from browning and adds a great taste). Lay all of your ingredients out individually.
  3. Fill up a bowl with warm water. Make sure the rim of the bowl is large enough for you to dip the rice paper roll in it without it having to bend or scrunch.
  4. Soak a tea towel with warm water and lay it out on your bench.
  5. Dip your rice paper roll into the bowl for 4-5 seconds until it is just softened. Place it straight onto your tea-towel, make sure there are no creases.
  6. Place coriander in a small row in the centre of the roll, then shredded carrot, avacado, prawns and mint leaf.
  7. Roll and place on a small plate. Repeat steps 5 and 6.
  8. Serve with your choice of dipping sauce, I find that these are fine without a sauce but you can combine hoisin, plum, chilli and peanut sauce (equally) for a dipping sauce or cheat and use a good quality sweet chilli. It is up to you!


Dr Bircher’s Quinoa Muesli

Dr Bircher’s Quinoa Muesli

I recently holidayed in Hawaii where I had bircher muesli almost for breakfast almost every day! It was creamy, luxurious and refreshing all at the same time.  Bircher muesli was created by Swiss physician Dr Maximilian Bircher-Benner for his patients in the 1900s. Dr Bircher-Benner was a pioneer in nutritional research. His theory of life was based on harmony between people and nature. He is credited for changing the eating habits of the late 19th Century, advocating a diet of fruits, vegetables and nuts as opposed to meat and white bread.

This recipe is adapted from Neil Perry’s recipe. It uses lemon juice instead of the traditional apple/orange. You can vary this recipe according to your own individual taste. I love berries for breakfast so have topped mine with a blueberry compote and banana but you can add whatever topping you like. I also use quinoa flakes for mine as opposed to traditional oats but you can use traditional oats if you prefer! Try to soak the muesli for as long as possible. This breaks down the natural fibres and makes them a lot easier to digest. You can double the recipe and store for a week in the fridge!

If you would like to receive similar recipes in your inbox, be sure to add your email address to the follow link 🙂

Ingredients (Makes 2)

Quinoa bircher muesliDay 1: 

  • 1 cup quinoa flakes or rolled oats
  • 1/2 cup greek yoghurt
  • pinch cinnamon
  • 1 x lemon, juiced (1/2 cup in total)

Day 2:

  • 1/2 cup blueberries
  • 1 x gala or pink lady apple (quartered and coarsely grated – keep the juice!)
  • 2 tab nuts/seeds of your choice
  • 1 tab honey

To prepare:

  1. Mix all of the day 1 ingredients in a small air-proof container. Refrigerate overnight.
  2. Mix in shredded apple, top with fruit, nuts and honey.

Blueberry compote:

  1. Mix blueberries in a small frypan with 2 tab water. Simmer for 5 minutes. Spoon over muesli.

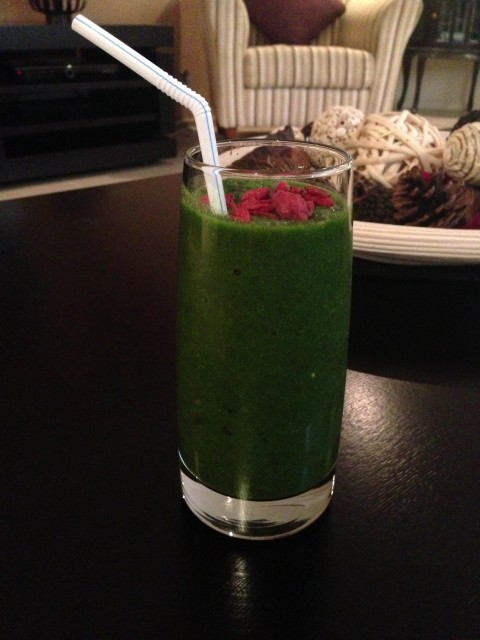
Detox green smoothie.

December sux when it comes to trying to eat clean.. I ENVY people who have the discipline to go to Christmas and end of year functions and not eat a thing. I on the other hand can’t help but  dig into all the canapes, finger food and banquets. I completely wrote-off my normal diet during the month of December and now that I am back at work, have a bit of a routine happening and not going to party after party am back to eating fresh and clean.

The best thing about this smoothie is it actually tastes great!! When I first made it, I was actually cringing at the thought because it sounded really gross but I was pleasantly surprised. The ingredients are also cheap and always in season which is great in my books. I make a whole bottle of this and then store it in my fridge for 4 days.. This works for me because I don’t want to be constantly chopping and cleaning!

If you would like to receive similar recipes in your inbox, be sure to add your email address to the follow link 🙂

Ingredients (makes about 1 litre of smoothie)Serve topped with goji berries and chia seeds.

  • 2 x cup of water
  • 1 x large bunch kale
  • 1 large head of cos lettuce
  • 1 x apple
  • 1-2 bananas
  • 1 x Lebanese cucumber
  • ½ cup x coriander
  • ½ cup x parsley
  • Juice of 1 lemon
  • chia + goji berrys (to top)

To prepare:

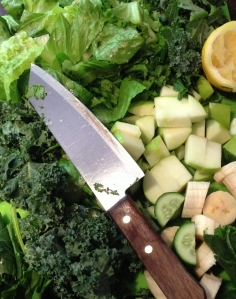
  1. Chop all of your ingredients.
  2. Pour water and cos lettuce into high speed blender, blend on low speed until pureed.
  3. Increase the speed and add chopped kale, blend until pureed.
  4. Add coriander and parsley, blend.
  5. Add chopped apple and bananas, blend.
  6. Add lemon juice and blend until smooth. You may want to add water if the consistency is not right.
  7. Pour into air-tight jars and top with chia + goji berries before serving.

Yummy rich green veggies

Coconut and raspberry chocolaty muffins

I initially made these for a friend of mine who is a caeliac, only to find out they fit all the criteria for paleo!  I personally don’t believe in eliminating anything from your diet unless you have a real intolerance.  Not sure why you would want to eat like a caveman when society has changed so much and nowadays we are glued to our computers/phones/ipads, work in sedentary office jobs and don’t go out hunting your food but to each their own!

Regardless of my obvious cynicism towards the paleo diet or ‘lifestyle’. I do think it has some benefits. Number one, I have discovered so many amazing alternatives to flour and these are fantastic when it comes to clean treats, number two, it is great for making cakes and sweets for kids to take to school where a child may actually have a real allergy or intolerance and number 3, it is such a fad! hashtagging paleo on my instagram feed means a photo instantly gets up to 200 likes (although I think I did offend a few paleo junkies/slash apparent experts in nutrition by hashtagging foods that obviously weren’t paleo! #hatersgonnahate)

These muffins are great. The tartness of the raspberry coupled with the toasty coconut and chocolaty cacao nibs make them a real treat. They are also really easy to make, only use one bowl and are full of anti-oxidants, superfoods (yep another craze) and good fats.  The only down side to these muffins is the cost.. I found coconut flour and cacao nibs to be crazy expensive and in limited supply so I’d save these for special occasions and for making for friends who have real sensitivities.

Ps: I am in no way, shape or form an expert in the paleo diet.. my exposure to it has been limited to the opinion of a few people who seem to jump onto the latest fad diet and claim it as gospel..

Delicious gluten and wheat free treats.

Delicious gluten and wheat free treats.

Ingredients:  (Makes 6 massive muffins or 12 mini muffins)

  • 1/2  cup raspberries
  • 60 gm cacao nibs
  • 6 x medium sized eggs
  • 1x  tab vanilla extract
  • 2 x tab  honey
  • 1/4 x cup coconut oil
  • 1/2 cup x coconut flour
  • 2 x tsp gluten free baking powder
  • 2 x tab chia seeds
  • 1x  tab shredded unsweetened coconut


To prepare:

  1. Prepare muffin tray (I buy cafe paper from the cake section at the supermarket but cupcake liners work well too)
  2. Preheat oven to 160 C
  3. Using an electric beater on medium, mix the eggs, vanilla and honey for 10 minutes until light and creamy
  4. Pour in the coconut oil with the eggs while beating and mix well.
  5. Add the coconut flour and baking powder and mix until combined.
  6. Fold in chia, raspberry and dark chocolate.
  7. Sprinkle with shredded coconut.
  8. Divide mixture into small muffin cups.
  9. Bake for 30 minutes if making small muffins or 45 minutes for large (they are cooked when you can insert a skewer and it comes out clean).
  10. Place onto cooling tray and let them cool,the raspberries can be really steamy and burn you otherwise!! (I found this out the hard way).

Chicken Laksa

I was in Thailand 5 years ago and we ended up being stuck in Patong. There were riots in Bangkok and we couldn’t leave the island. Obsessed with the freshness of the foods and the real differences between the thai food we had at home and the food on the island, my friend and I enrolled in a Thai cooking course for the week and learnt all the essentials.

Laksa is one of my favourites. It is a filling, delicious comfort food that makes me feel all happy and warm when I eat it. It can, however be really fattening. This recipe uses reduced fat coconut milk and I try to buy the can with the lowest fat per 100gm (you’ll need to read the labels as there can be HUGE discrepancies between brands)..

I usually make a whole batch of red curry paste and store it for 3 months. You can cheat and use store bought Laksa paste if you prefer…

Ingredients (Serves 4)

  • 60gm rice vermicelli noodles
  • 1 tblsp vegetable oil
  • 3 tab laksa paste
  • 2 1/2 cups chicken stock
  • 400gm chicken breast fillet, thinly sliced
  • 100gm shiitake mushrooms, sliced
  • 1 cup (250ml) reduced-fat coconut milk
  • 100gm bok choy (or any other vegetable you prefer)
  • 2 kaffir lime leaves, shredded
  • 1/2 cup coriander, torn
  • 50gm bean sprouts
  • Sliced cucumber, red chilli, lime wedges, crunchy chinese noodles and fish sauce, to serve (optional)

To prepare:

So fresh and delicious

So fresh and delicious

  1. Prepare the noodles according to the instructions on the packet.
  2. Heat the oil in a large saucepan over medium heat. Add the paste and cook, stirring, for 2 to 3 minutes or until fragrant.
  3. Pour in the stock and bring to the boil, then reduce heat and simmer for 5 minutes.
  4. Add the chicken, mushrooms and milk, and simmer for 5 minutes or until chicken is just cooked.
  5. Add the bok choy, lime leaves and noodles. Cook for a further 2 minutes until bok choy is slightly wilted.
  6. Divide the laksa, coriander and bean sprouts among four bowls and top with cucumber, chilli, lime juice and drops of fish sauce. Go easy on the salt!

Home-made Laksa paste:

  • 6 long red chillies
  • 1 tsp ground coriander
  • 1/2 tsp sweet paprika
  • 1/2 tsp ground cumin
  • 1/2 tsp ground turmeric
  • 1 brown onion, chopped
  • 2 lemongrass stalks, white part only, chopped
  • 3cm piece galangal, peeled, chopped
  • 5 cashew nuts
  • 2 garlic cloves, chopped
  • 2 teaspoons dried shrimps
  • 1 tab peanut oil

To prepare:

  1. Place coriander, paprika, cumin and turmeric in a small frying pan over medium heat. Cook for 1 to 2 minutes or until fragrant. Allow to cool completely.
  2. Place chillies, onion, lemongrass, galangal, nuts, garlic, shrimp and spice mixture in a food processor. Process until finely chopped. Add oil. Process until a smooth paste forms. Freeze in an airtight container for up to 3 months.