Traditional Lebanese Hummus Recipe

hummus There are so many variations on how to make hummus that I enlisted my mum’s recipe. My mum is THE BEST COOK I have ever come across. As she doesn’t use recipes when cooking, I tried to get as close to real measurements as possible. I have tested this out and it works well. You can cheat by using canned chickpeas… it won’t taste as amazing, but it will be pretty close 🙂 Serve with this delicious nut bread for a complete meal..

If you would like to receive similar recipes in your inbox, be sure to add your email address to the follow link 🙂

Preparation (the day before)

1.  Soak your chickpeas in hot water for 8 hours or overnight. 

Ingredients:                     

  • 2 x cups chickpeas, still warm, or cold and peeled (see step 1)
  • 1/4 x cup tahini
  • 2 1/2 x fresh lemons, or about 8 tablespoons lemon juice
  • 1-2 cloves of garlic, pasted (bang with mortar and pestle, crushing doesn’t work!)
  • 1 tsp sea salt
  • 1 tsp cumin
  • paprika to serve
  • really good quality extra virgin olive oil to serve (you can go without if you’re dieting)

To prepare:

  1. Rinse the soaked chickpeas, and then pour then into another pot and boil them for around an hour until tender. (Keep the water you boil them in). Set aside 2-3 tab of chickpeas for later.
  2. Pour tahini and lemon juice into your food processor and pulse until creamy and pale in colour. Add salt, and garlic to your lemon-tahini sauce.
  3. Pour chickpeas into a food processor and blend well.  Add as much of the water left over from step 1 as you want to achieve your desired thinness.  Taste and adjust seasonings. 
  4. Let this all run in your food processor for 2-3 minutes until smooth.

Serve drizzled with olive oil, and top with extra chickpeas, paprika or cumin.

hummus2

The basics – Easy low calorie Minestrone Soup

Cooking at home, often means making do with what you have got. This is where this recipe comes in. Minestrone Soup is an Italian soup, made using vegetables, pasta and a basic tomato broth it is traditionally a ‘poor person’s recipe’, bringing together a range of ingredients to make a nourishing hearty meal. I have adapted the recipe to create a low-calorie version which doesn’t compromise on nutrients. You can substitute the vegetables and type of pasta, add meat or even noodles. The options are limitless..

If you would like to receive similar recipes in your inbox, be sure to add your email address to the follow link 🙂

Ingredients (Makes 8 servings – portion up whatever you don’t need and freeze for later).

  • 2 litres vegetable stock

    garnish with fresh basil and parmesan cheese

    garnish with fresh basil and parmesan cheese

  • 2 cups water
  • 5 heaped tablespoons of tomato paste
  • 2 x onions chopped
  • 3 x cloves garlic, crushed
  • 3 x celery sticks, sliced
  • 3 x carrots, peeled and diced
  • 3 x zucchinis, sliced (just less than 1cm)
  • 800gm butter beans (2 cans)
  • 2 x cups pasta (I use macaroni, penne or spiral depending on what is in the pantry).
  • 1 x tab
  • Fresh basil and parmesan (to top)
  • Salt and pepper

To prepare:

  1. Prep your vegetables, and crush garlic
  2. Heat oil in a large saucepan on medium heat. Lightly fry the onion and garlic until the onion is clear and translucent (around 7-8 minutes)
  3. Add stock, water, pasta, tomato paste, celery and carrots. Bring to the boil and simmer for 10 minutes.
  4. Add zucchini and butter beans. Cook for a further 5 minutes.
  5. Season with salt and pepper, top with basil and parmesan.

Note: I portion up extra servings and freeze them for later. You can also half the recipe and make less.

soup pot

Green detox soup

This soup is so lush and creamy it is hard to believe it is healthy. Granted it can look a little gross and green, however it tastes amazing once you get over the colour. I created this recipe for my nephew. He had a few tummy problems and the doctor put him on a ‘soup’ diet… when I asked him what type of soup, he said ‘asparagus’… he needed something that would literally flush out his bowels…. asparagus helps with liver drainage and flushing out toxins. Leek gives the soup a subtle caramalised onion flavor. It is also a mild diuretic!! The book ‘French Women Don’t Get Fat’ recommends a Magical Leek Soup to kick off the weekend (in other words, make you go to the toilet like crazy)… this soup is nowhere near as hard core and tastes ten times better.

Ingredients (serves 8, freeze leftovers for later):                                

  • 800gm asparagus (or 4 bunches), woody ends removed Simmer gently for 20 minutes
  • 2 leeks, trimmed
  • 2 medium spring onions, peeled
  • 2 sticks celery, trimmed
  • 2 litres organic vegetable stock
  • 2 tab olive oil

To prepare

  1. Roughly chop all of your greens, save some of the asparagus spheres for later.
  2. Heat olive oil in a large saucepan on medium, add onion, celery and leek. Stir to coat in the oil. Cook for 10 minutes, stirring occasionally. They should be soft by the end of this process but not brown.
  3. Add asparagus stalks and stock. Simmer for 20 minutes with the lid on.
  4. Remove from heat. Blend using a hand blender until smooth.
  5. Season with salt and pepper. Top with asparagus spheres when serving.

How to make healthy berry compote!

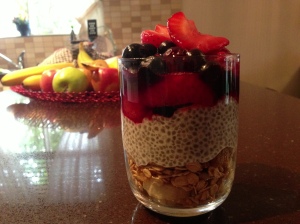
Berry compote makes everything taste ten times better. It is also super easy and so versatile. I add it to everything – French toast, chia puddings, pancakes, granola, chocolate cake, chocolate pudding, brownies etc…

I’ve included some basic steps below on how to make a healthy version… (note – you can add a tab of caster sugar if you like, I prefer it without!).

Ingredients:

  • 1 cup strawberries, rinsed and hulled

    Add to a chia and granola pudding

    Add to a chia and granola pudding

  • 1/2 cup raspberries
  • 1/2 cup blueberries
  • zest and juice of an orange

To prepare:

  1. Place orange juice, zest (sugar if you are using it) and strawberries in a shallow frying pan. Simmer gently for 2 minutes.
  2. Turn the strawberries over and simmer for 2 minutes.
  3. Add the blueberries, simmer for another minute.
  4. Add the raspberries, toss them through gently. Remove from heat.

Use as a topping or a side. Stores in the fridge for up to 5 days.

Enjoy over yoghurt and fluffy whole meal and ricotta pancakes

Enjoy over yoghurt and fluffy whole meal and ricotta pancakes

poached berries in progress

The most scrumptious cafe style blueberry muffins

If you’re in Sydney and love treats, you will be quite familiar with Luxe bakery. They make the most amazing delicious muffins, croissants and cakes.They also make a blueberry muffin that I am obsessed with. Every once in a while I treat myself to their muffin and sit in the corner eating it, secretly hoping that no one will ask to share.

This is my take on trying to make something similar. I’ve added greek yoghurt for extra protein and moisture (no one likes a dry muffin), a shit-load of blueberries for their awesome anti-oxidants (plus they taste so good) and sweetened them with honey and apple instead of sugar (eww). Try this out. You will love it.

Ingredients (Makes 8 big muffins)

  • 2 x cups rolled oats                                                                          muffins
  • 1 x cup wholemeal flour
  • 1/4 cup ground flaxseed
  • 1 x cup vanilla flavoured greek yoghurt
  • 4 x eggs
  • 60 ml coconut oil
  • 2 x apples
  • 1 x punnet of blueberries
  • 2 tsp baking powder
  • 1 tsp ground cinnamon
  • 3 tab honey
  • 1 tsp vanilla extract

To prepare:

  1. Preheat your oven to 160 C and prep your pan by spraying it with olive oil spray.
  2. Mix oats into a large bowl with linseed,  yoghurt, oil, vanilla, baking powder, cinnamon, honey and eggs and allow to soak for 15 minutes. This will break down the oats and make them soft and fluffy.
  3. Grate the whole apple over the bowl so that you capture the skin and juice.
  4. Add the flour and mix through lightly to form your muffin batter.
  5. Gently mix in 3/4 of the blueberries.
  6. Spoon into your muffin tray. Sprinkle oats and blueberries over the top. Gently pushing the blueberries into the batter. Try not to bury them completely though.
  7. Bake for 30-35 minutes. Test if they are ready by inserting a metal skewer. It should come out relatively clean.

Creamy mushroom risotto

Creamy mushroom risotto

Sometimes you just need to indulge. I developed this recipe for my sisters. I have 3 beautiful, amazing sisters who are my bestest friends and are a grounding force in my life. They are also mothers to young children who hardly get a spare minute. We had lunch at my house for one of their birthdays so I thought I would spoil them, they LOVE my creamy mushroom sauce so I thought I would mix it up and create a risotto out of the base recipe. I honestly believe life is all about balance and just like extreme eating is bad, extreme dieting/restriction is horrible.

There’s a bit of a spin on the traditional risotto by adding brie cheese. It adds that extra bit of luxury. If you are having people over, I recommend you prep the risotto beforehand and add the cream/mushrooms at the last minute.

Ingredients (serves 4) risotto

  • 1 tablespoon olive oil
  • 100g unsalted butter
  • 2 leeks, finely chopped
  • 2 garlic cloves, crushed
  • 2 tablespoons finely chopped rosemary leaves, plus extra leaves to serve
  • 1 1/3 cups Arborio Risotto Rice
  • 4 cups vegetable stock, heated
  • 100ml pure (thin) cream
  • 300g brown mushrooms, sliced
  • 150g brie, torn

To prep:

  1. Place oil and half the butter in a pan over medium-low heat. Cook leek, garlic and half the rosemary, stirring, for 6-8 minutes until soft.
  2. Add rice, stirring to coat grains. Stir in stock, a ladleful at a time, allowing each to be absorbed before adding the next. Continue to cook, stirring constantly, for 30 minutes or until al dente (you may not need all the stock). Stop here if you are serving guests later.
  3. Stir in cream and cook for a further 2-3 minutes until warmed through.
  4. Melt remaining butter in a pan over high heat. Cook mushrooms and remaining rosemary for 6-8 minutes or until mushrooms are golden. Season.
  5. Serve risotto immediately, topped with mushrooms, brie and rosemary leaves.

How to poach the perfect egg!

How to poach the perfect egg.

I am constantly being asked via my instagram feed how I get my poached eggs so perfect. I decided to add a quick little guide. Please comment below if you find this handy and I will post a few more ‘how to’ guides.

  1. Make sure the egg is at room temperature and break it into a small bowl        
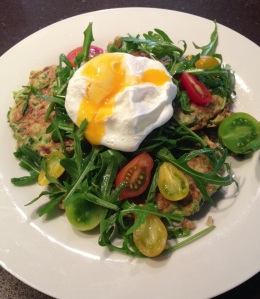
    A perfect addition to my zucchini, pea and mint fritters.

    A perfect addition to my zucchini, pea and mint fritters.

                  
  2. Fill a small saucepan with water deep enough to shape your egg
  3. Add 2-3 tab vinegar
  4. Bring to the boil, then reduce to a simmer and swirl into a whirlpool
  5. Drop the egg into the center. The spinning water will cause it to bind together (coagulate)
  6. Simmer for 2 minutes if you like it runny or 4 minutes if you like it hard.
  7. Remove with a slotted spoon. Let it drain then serve it.

If you’re making them for a big group have a pan of cold water ready and drop your eggs into there as they’re ready. This will stop the cooking process. Dip them into a pot of boiling water afterwards to re-heat.

Voila – perfect poached eggs.

As you get used to the water temperatures/spinning technique, you won’t need vinegar (I didn’t use it today). But it definitely helps at the start!

Serve with sourdough, smoked salmon, fresh herbs, smashed avocado, hollandaise sauce etc.

Green detox salad

The human body is an amazing being. Its ability to naturally cleanse itself is remarkable. The proliferation of celebrity  photo (9)endorsed juice diets, skinny teas and quasi-starvation detox programs is not only irresponsible, but scary. It never ceases to amaze me however, the way in which fast detoxes are being marketed and sold to people as a ‘get thin quick’ scheme. To be honest, I have actually never met anybody that had long-term sustainable healthy weight loss through starving themselves, limiting their diet to lemon juice and a load of diuretics.

A detox should be about restoring balance to your body by using food to help nurture and restore health and eating high fibre whole foods which eliminate toxins from the body and aid elimination. To me, a detox is about eating normal things. Things that grow in the ground and have the ability to nourish you. This salad is amazing for its ability to do just that. It contains nutritionally dense green super foods such as broccoli and kale.

Kale – increases alkalinity and detoxification to promote healing. Rich in so many nutrients.

Chilli – a detoxifier which removes waste products from our body and increases the supply of nutrients to the tissues and helps in the digestion of food.

Ginger –  high in gingerol and shoga, stimulates digestion, circulation and sweating. Its digestive actions serve to cleanse the build-up of waste and toxins in the colon, liver and other organs. Relieving stomach discomforts such as gas and bloating.

Lemon juice – a host of detoxing qualities such as balancing calcium and oxygen levels in the liver and aiding in the production of digestive juices.

Ingredients (Makes 4 side or 2 main servings)

  • 1 x head of broccoli, roughly chopped
  • ½ bunch kale, trimmed and roughly chopped
  • 1 clove garlic, crush
  • 2cm knob ginger, grated
  • 2 tab olive oil
  • 1 x lemon, juiced
  • 1 x long red chilli, seeds removed and chopped
  • 1 x cup red quinoa

 To prepare:

  1. Prep your quinoa by running it under a sieve of cold water and rubbing it. This will get rid of the yukky bitter coating.
  2. Add 1 cup quinoa to 1 1/2 cups of boiling water
  3. Simmer gently (stirring occasionally) for 15-20 minutes until quinoa has soaked up all the water. Taste the quinoa, it should be soft and nutty. Drain.
  4. Sauté the broccoli for 5 minutes in a large pan with the olive oil, garlic and ginger over a medium heat.
  5. Toss through the quinoa, kale and chilli. Keep tossing until the kale is wilted. (Around 2 minutes)
  6. Add the lemon juice and serve.

Handy tip: don’t add the lemon juice until right before serving as the quinoa will soak it up and cause it to go slightly soggy if stored for too long.

Lush cleansing green smoothie

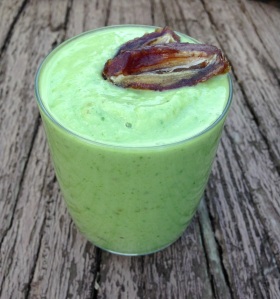
top with a dateGreen smoothies remind me of Monday mornings. They are usually made following a weekend filled with lots of indulgent creamy sauces, cheeses and carbs. All the guilt associated with having a few cheat meals here and there is washed away and my body feels nourished, cleansed and detoxed yet again. Now I know one green smoothie does not outweigh having double servings of desert but it is definitely a great way to get you back on track for the week ahead.

This smoothie is a complete meal. It is packed with nutrient dense foods – spinach, banana, ginger, avocado, a date for extra sweetness and delicious tahini for added protein and a lush creaminess. The recipe below is for two massive servings. The lemon juice stops the avocado from browning, meaning you can keep one serving for the next day.

Ingredients: (Makes 2 main meal servings or 4 snack size)      creamy green smoothy

  • 2 x massive handfuls of baby spinach (about 2 cups)
  • 2 x cups coconut water (you can use filter water if you don’t have this)
  • 2 x medjool dates (pitted)
  • 1 x 2 cm knob of ginger, roughly chopped
  • Juice of 1 lemon
  • 1 x banana
  • 1 x avocado
  • 2 x tab tahini

To prepare:

  1. Blend all of your ingredients together.
  2. Add topping of your choice.

Salted Chocolate brownies

Ingredients:

  • 10 mejool dates, pitted    Serve with fresh berries
  • ¼ cup cocoa powder
  • 1 x cup walnuts
  • 1 x cup almonds
  • 2 tsp vanilla bean paste
  • 4 tab protein powder
  • 2 tab water
  • 1/2 tsp sea salt

To Prepare:

  1. Combine nuts into a food processor until roughly chopped.
  2. Remove 1/4 of the nut mixture and set aside.
  3. Add the dates, vanilla, protein powder, cocoa and sea salt to the food processer. Process again until combined.
  4. Add the water and blend until it becomes like cookie dough.
  5. Add the nuts that you set aside and mix well
  6.  Press into a small square baking tin lined with grease proof paper.
  7. Refrigerate for 3 hours and then serve 🙂